

How to use wick trimmers for a cleaner, longer burn
Have you ever lit your favourite candle only to watch it produce black soot, smoke or burn unevenly down one side? These frustrations are surprisingly common among candle enthusiasts, yet they’re entirely preventable with one simple habit: proper wick trimming. Using specialised wick trimmers before each burn transforms your candle experience, extending burn time by up to 25% whilst creating the clean, even flame you deserve. This guide will show you exactly how to trim wicks correctly for a premium, mindful candle care ritual that maximises every moment of calm.
Key Takeaways
| Point | Details |
|---|---|
| Improved burn quality | Trimming to the correct length controls flame size for a clean, even melt and reduced soot. |
| Longer candle life | Regular wick trimming can extend burn life by up to 25% by preventing rapid wax consumption from oversized flames. |
| Safety advantages | Oversized flames from untrimmed wicks pose fire risks, while a trimmed wick burns steadily at the ideal temperature. |
| Specialised tools | Use specialised wick trimmers with angled blades and a catch tray to prevent debris entering the wax. |
Why trimming your candle wick matters
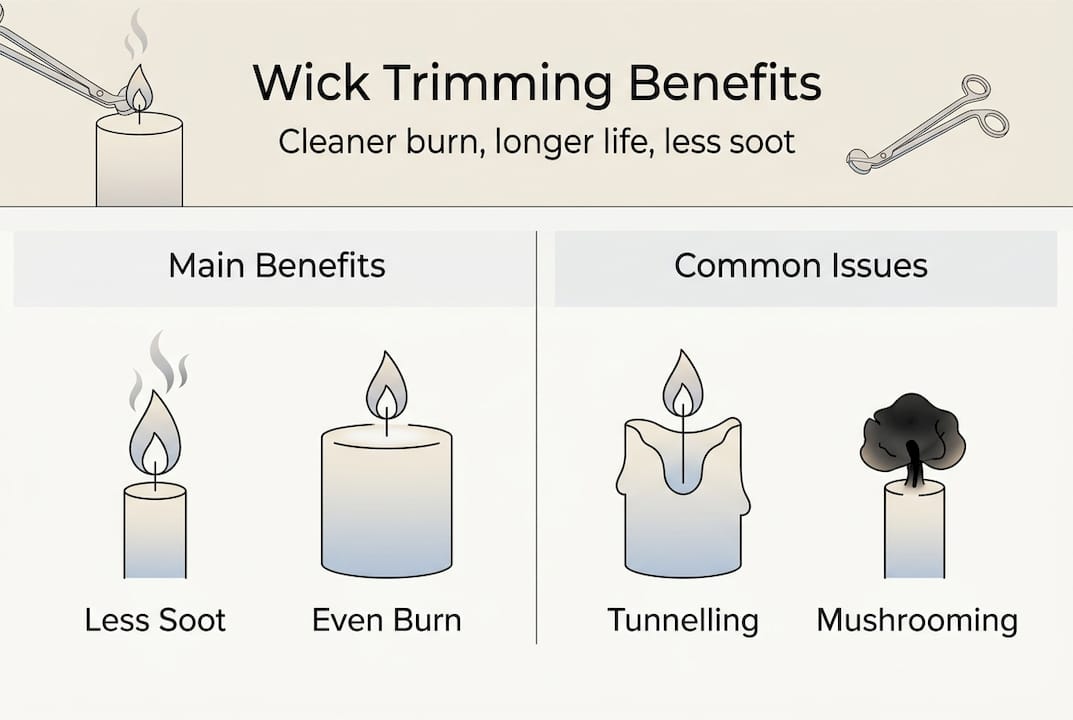
Proper wick maintenance directly impacts every aspect of your candle’s performance, from burn quality to longevity. When you trim your wick to the correct length, you control the flame size, which determines how cleanly and evenly the wax melts. An untrimmed wick creates an oversized flame that produces soot, smoke and uneven wax pools that tunnel down the centre, wasting precious wax along the sides.
The benefits extend far beyond aesthetics. Regular wick trimming can extend your candle’s life by up to 25% by preventing the rapid wax consumption that occurs with oversized flames. You’ll notice stronger scent throw as well, because a properly sized flame creates an optimal wax pool that releases fragrance oils more effectively. The controlled burn temperature ensures your fragrance performs exactly as intended, filling your space with consistent aroma rather than overwhelming bursts followed by weak scent.
Safety represents perhaps the most compelling reason to maintain your wicks. Oversized flames from untrimmed wicks pose genuine fire risks, particularly in deep jar candles where excess wick length can cause dangerous flare-ups. A trimmed wick produces a steady, manageable flame that burns at the ideal temperature for your specific wax type.
Beyond the practical advantages, incorporating wick trimming into your routine creates a meaningful ritual. This mindful practice signals the transition into relaxation time, transforming candle care from a chore into a calming ceremony that enhances your overall wellbeing.
“Trimming your wick before each burn is the single most important step in candle care. It’s the difference between a premium experience and a disappointing one.”
Tools and preparation for trimming your candle wick
Whilst you might be tempted to grab household scissors, specialised wick trimmers offer distinct advantages that make them essential for proper candle care. These tools feature angled blades specifically designed to reach deep into jar candles, plus a small tray or plate beneath the blades that catches trimmed wick debris. This catching mechanism prevents charred wick pieces from falling into your wax, where they’d create unsightly black spots and potentially affect future burns.
The angled design allows you to position the trimmer vertically into narrow candle jars whilst maintaining a horizontal cut across the wick. Standard scissors lack this precision and often leave frayed edges that can cause smoking. Nail clippers, another common substitute, simply can’t reach deep wicks safely and may contaminate your wax with metal particles.
| Tool | Blade type | Debris management | Reach depth | Precision |
|---|---|---|---|---|
| Wick trimmers | Angled, sharp | Built-in catching tray | Excellent for deep jars | Professional clean cut |
| Scissors | Straight | None (debris falls in wax) | Limited | Imprecise, may fray wick |
| Nail clippers | Curved | None | Very limited | Poor angle control |
Before you begin trimming, ensure your candle has been extinguished for at least two hours and the wax has completely solidified. Hot or soft wax allows debris to sink in rather than rest on the surface for easy removal. Gather these materials:
- Premium wick trimmers with sharp, clean blades
- Candle snuffer for safe extinguishing after your burn
- Small tissue or cloth to wipe trimmer blades between uses
- Matches or lighter for relighting (never use after trimming without removing debris)
Pro Tip: Store your wick trimmers near your candles so they become part of your natural lighting routine. When trimmers are easily accessible, you’re far more likely to use them consistently before every burn.
Step-by-step guide to using wick trimmers correctly
Mastering the wick trimming technique ensures you achieve professional results every time. Follow this precise sequence to maintain optimal wick length and prevent common mistakes that compromise your candle’s performance.
-
Verify the candle is completely cool. Touch the wax surface gently to confirm it has fully solidified. This typically requires at least two hours after extinguishing, though larger candles may need longer. Trimming hot wax allows debris to sink and contaminate your wax pool.
-
Position your wick trimmers vertically. Hold the tool with the angled blades pointing downward and the catching tray positioned directly beneath the wick. The vertical orientation allows you to reach deep into jar candles whilst maintaining control.
-
Measure 1/4 inch from the wax surface. For cotton or paper-cored wicks, aim for approximately 6mm of exposed wick. Wooden wicks require shorter trimming to about 1/8 inch (3mm) due to their different burning characteristics. This measurement applies to every burn, not just the first.
-
Make a clean, decisive cut. Squeeze the trimmer handles firmly to sever the wick in one smooth motion. Hesitant or sawing cuts create frayed edges that smoke. The debris should fall cleanly into the catching tray.
-
Remove all wick debris from the wax. Carefully lift out any charred pieces resting on the wax surface using the trimmer or your fingers. Even tiny fragments can affect your next burn, creating smoke or uneven melting.
-
Wipe your trimmer blades clean. Use a tissue to remove any soot or wax residue from the blades before storing. Clean tools make cleaner cuts and last longer.
Pro Tip: If you’ve forgotten to trim before lighting and notice excessive smoking, extinguish the candle immediately, wait for it to cool completely, then trim and remove debris before relighting. Never attempt to trim a burning wick, as this poses serious burn risks and contaminates the wax pool.
Consistency matters more than perfection. Making wick trimming part of your candle ritual ensures you never skip this crucial step. Many candle enthusiasts trim immediately after extinguishing whilst the wick is still visible and upright, then remove debris once cooled.
“The ritual of trimming your wick transforms candle lighting from a mundane task into a mindful practice. It’s a small act of care that yields significant rewards.”
Troubleshooting wick trimming and expected results
Even with careful attention, you may encounter issues that signal incorrect trimming technique or frequency. Understanding these problems and their solutions helps you achieve the premium burn quality your candles deserve.
Tunnelling occurs when wax melts only in the centre, leaving a thick wall around the jar’s perimeter. Whilst often blamed on short burn times, excessively long wicks can also cause tunnelling by creating too hot a flame that melts wax too quickly in one spot. Consistent trimming to 1/4 inch before each burn prevents this issue by maintaining optimal flame size.
Excessive soot and smoking indicates your wick is too long or has become mushroomed at the tip. The carbon buildup creates a larger flame that can’t burn cleanly. Trim immediately (after cooling) to restore clean combustion. Black marks on your jar’s interior confirm this problem.

Weak or flickering flames suggest over-trimming. If you’ve cut the wick shorter than 1/8 inch, it may struggle to draw enough wax up for proper combustion. Unfortunately, you can’t lengthen a wick once cut, so you’ll need to burn carefully until enough wick becomes exposed, then maintain the correct length going forward.
Debris in the wax pool results from trimming whilst wax was soft or failing to remove clippings. These particles will smoke when you relight. Remove them carefully with tweezers or by allowing the wax to harden completely, then lifting them out.
| Problem | Cause | Solution | Prevention |
|---|---|---|---|
| Tunnelling | Wick too long or short burn times | Trim to 1/4 inch, burn 2-4 hours minimum | Regular trimming before each burn |
| Black soot | Wick too long, mushroomed tip | Trim to proper length, clean jar interior | Never skip pre-burn trimming |
| Weak flame | Wick trimmed too short | Burn carefully until adequate length exposed | Measure carefully, don’t over-trim |
| Smoking | Debris in wax or untrimmed wick | Remove debris, trim to 1/4 inch | Clean wax surface after trimming |
| Large flame | Untrimmed or excessively long wick | Extinguish, cool, trim to 1/4 inch | Trim before every single burn |
When you maintain proper wick length consistently, you’ll notice remarkable improvements. Your candles will produce even wax pools that reach the jar’s edges, maximising wax usage. The flame will remain steady and appropriately sized, around 1 inch tall. Smoke and soot virtually disappear, keeping your jar clear and your air clean. Most importantly, your candles will burn significantly longer, with many users reporting 25% extended burn times through proper maintenance.
Scent throw improves noticeably as well. The optimal flame temperature created by a properly trimmed wick releases fragrance oils at the ideal rate, neither overwhelming your space with initial intensity nor fading to imperceptible levels. You’ll experience consistent, room-filling aroma throughout the candle’s life.
These results represent the standard you should expect from quality candles paired with proper care. If problems persist despite correct trimming, the issue may lie with the candle’s construction rather than your maintenance routine.
Discover premium natural wax candles and accessories
Now that you understand the transformative power of proper wick care, elevate your entire candle experience with mi KALMA’s collection of artisanal, eco-conscious candles and accessories. Our handcrafted candles feature 100% natural European rapeseed wax, a renewable crop that delivers cleaner, longer burns than imported alternatives. After extensive testing, we chose rapeseed wax for its superior performance: stable, consistent melting and exceptional scent throw.

Each candle contains 10% premium fragrance oil, vegan and phthalate-free, designed in France specifically for optimal candle performance. This concentration ensures powerful, room-filling aroma that mass-produced paraffin candles with their 2-3% fragrance loads simply cannot match. Discover our SANCTUARY scented candle and transform your space into a haven of calm. Complete your candle care ritual with our specially designed accessories, crafted to complement your mindful moments.
Frequently asked questions about wick trimmers
How often should I trim my candle wick?
Trim your wick before every single burn once the wax has completely cooled and solidified. This consistent routine prevents soot buildup, maintains optimal flame size and extends your candle’s life. Regular trimming takes mere seconds but dramatically improves performance.
Can I trim the wick whilst the candle is burning?
Never trim a burning wick or one in hot wax. This poses serious burn risks and causes debris to fall into the liquid wax pool, contaminating future burns. Always extinguish your candle, wait at least two hours for complete cooling, then trim and remove debris before relighting.
What length is ideal for wood wicks?
Wooden wicks require shorter trimming than cotton wicks, typically around 1/8 inch (3mm) from the wax surface. Wood burns differently than cotton, and excess length causes excessive crackling, smoking and oversized flames. Measure carefully before each burn for optimal results.
Why do I need special wick trimmers?
Wick trimmers feature angled blades that reach deep into jar candles and built-in trays that catch debris, preventing contamination. Scissors and nail clippers lack these design elements, often leaving frayed edges and dropping charred pieces into your wax. The investment in proper tools ensures professional-quality results and protects your premium candles.
How does wick trimming improve scent throw?
A properly trimmed wick creates an optimal flame size that melts wax at the ideal temperature for fragrance oil release. Oversized flames from long wicks burn too hot, overwhelming your space initially then fading quickly. Correctly sized flames provide consistent, room-filling aroma throughout your candle’s entire burn time, maximising your fragrance investment.