

How to prevent candle tunneling for cleaner, longer burns
You light your favourite handcrafted candle, anticipating the calming glow and soothing fragrance, only to find wax clinging stubbornly to the edges whilst the centre burns away. This frustrating phenomenon, known as candle tunneling, wastes wax, shortens your candle’s lifespan, and diminishes the sensory experience you deserve. Preventing tunneling isn’t complicated, but it requires understanding the science behind wax memory and following a few essential burning practices. This guide walks you through every step to keep your natural wax candles burning evenly from first light to final flicker, maximising both performance and enjoyment.
Key Takeaways
| Point | Details |
|---|---|
| First burn matters | The initial burn sets the wax memory and determines future melting patterns, so aim for a full even melt to the edges on the first use. |
| Precise wick trimming | Use wick trimmers to maintain a clean, even flame and prevent soot and uneven burning that encourages tunnelling. |
| Avoid drafts and short burns | Keep candles away from vents and drafts and burn for long enough sessions to create a complete first melt pool. |
| Choose quality candles | Invest in well crafted candles with properly matched wicks and natural waxes to reduce tunnelling risk from the outset. |
Understanding candle tunneling and its causes
Candle tunneling occurs when wax melts only centrally around the wick, leaving a solid wall of unmelted wax along the edges. This creates a deep vertical tunnel through the candle’s centre, wasting up to 40% of your wax. The culprit is something called wax memory, a phenomenon where candles remember the diameter of their first melt pool and repeat that pattern with every subsequent burn.
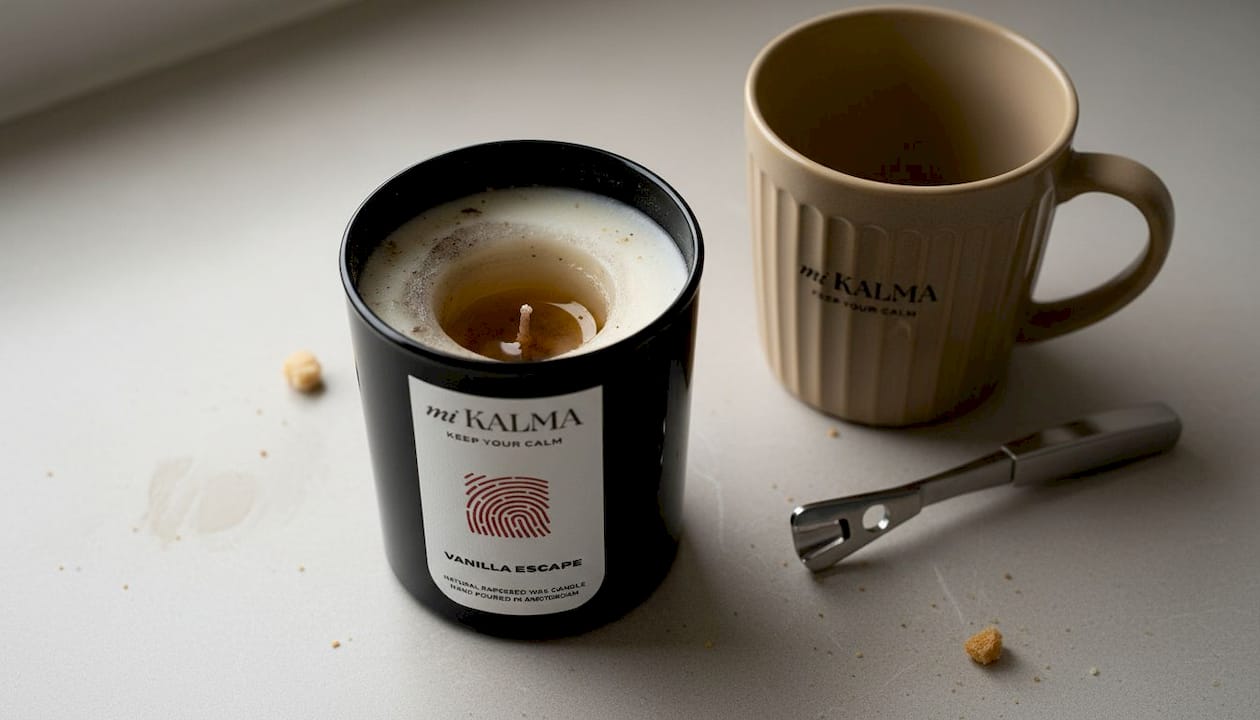
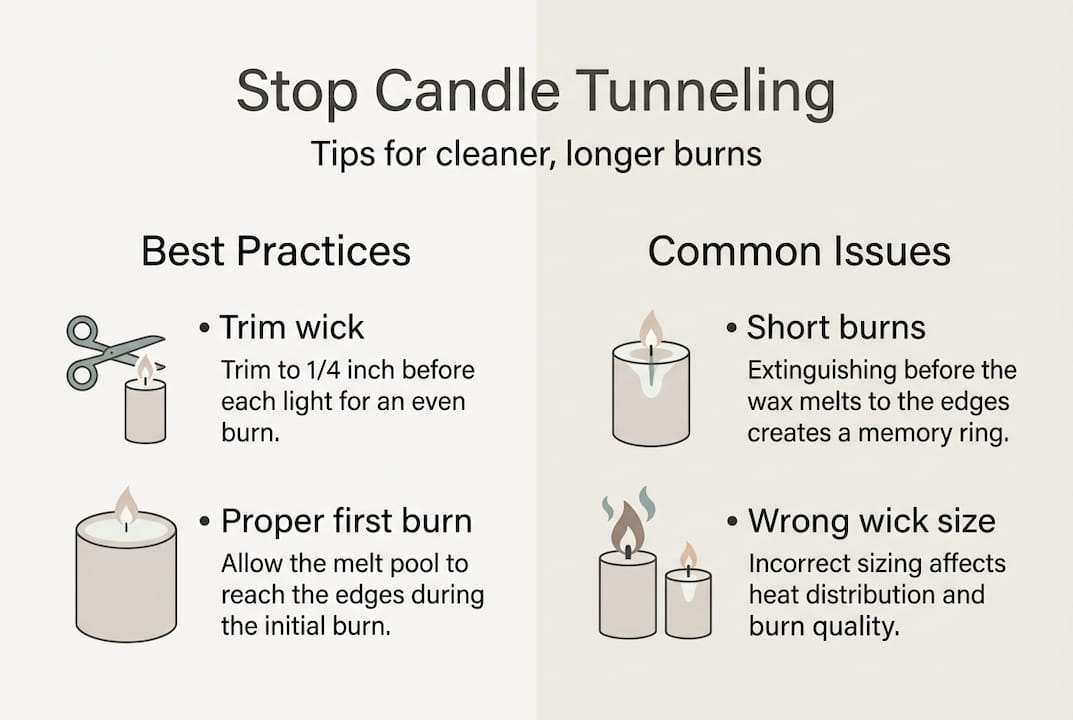
When you light a candle for the first time and extinguish it before the wax melts completely to the edges, you’ve essentially trained the wax to melt only to that initial radius. The solid edge acts as a barrier, preventing heat from reaching the outer wax during future burns. This memory ring becomes progressively deeper with each lighting, creating the characteristic tunnel shape that signals wasted potential.
Drafts compound the problem by cooling one side of the candle faster than the other, creating uneven melting patterns that reinforce tunneling. Similarly, short burns of 10 to 30 minutes don’t generate enough sustained heat to melt wax fully across the diameter. Each abbreviated session deepens the memory ring, making correction increasingly difficult. Understanding these mechanisms empowers you to intervene before tunneling becomes permanent.
“The first burn sets the stage for your candle’s entire life. Respect it, and your candle will reward you with even burns until the very last drop of wax.”
Several factors contribute to tunneling beyond burning habits:
- Undersized wicks that can’t generate sufficient heat for the candle’s diameter
- High-melt-point waxes requiring longer burn times to liquefy completely
- Cold ambient temperatures that accelerate wax cooling before full melt pool forms
- Placing candles near windows, fans, or air conditioning vents
Quality matters significantly. Premium candles using properly matched wicks and natural waxes burn more predictably than mass-produced alternatives with synthetic blends and inadequate wick sizing. Investing in well-crafted candles reduces tunneling risk from the start.
Preparation: what you need for a perfect candle burn
Before striking a match, gather the right tools and create an optimal environment. Wick trimmers are non-negotiable. These specialised scissors feature angled blades and a collection plate that catches trimmed debris, preventing carbon fragments from falling into melted wax where they create soot and uneven burning. Standard scissors leave debris behind and make precise 5mm cuts difficult.
Your burning surface matters more than you might expect. Choose a stable, heat-resistant platform away from flammable materials, positioned where air circulation remains minimal. Drafts from open windows, ceiling fans, or heating vents disrupt flame stability and create asymmetric melt pools. Even subtle air movement can cause flickering that leads to tunneling over time.
Candle characteristics determine your approach. Diameter directly correlates with required first burn duration, approximately one hour per inch of width. A 7.5cm diameter candle needs roughly three hours to establish proper wax memory. Rushing this initial burn virtually guarantees tunneling.
| Candle diameter | Minimum first burn time | Recommended maximum single burn |
|---|---|---|
| 5cm | 2 hours | 3 hours |
| 7.5cm | 3 hours | 4 hours |
| 10cm | 4 hours | 5 hours |
| 12.5cm | 5 hours | 6 hours |
Wax type influences melting behaviour. Natural waxes like European rapeseed wax offer excellent burn characteristics with lower melt points than paraffin, creating fuller melt pools more readily. Soy wax requires similar attention to first burn duration but may take slightly longer to achieve complete edge-to-edge melting.
Pro Tip: Before your first burn, measure your candle’s diameter and set a timer for the calculated duration. Treat this initial session as a non-negotiable appointment with your candle. Interrupting it creates the memory ring you’re trying to avoid.
Check your wick before lighting. A wick longer than 5mm produces excessive flame height, generating soot and potentially causing the wax to overheat in the centre whilst edges remain cool. Quality wick trimmers make this maintenance effortless, and the small investment pays dividends in candle longevity and performance.
Execution: step-by-step guide to prevent candle tunneling
Follow these sequential steps each time you burn your candle:
- Trim the wick to exactly 5mm using proper wick trimmers, collecting debris in the trimmer’s plate rather than letting it fall into wax.
- Place the candle on a stable, heat-resistant surface in a draft-free location away from vents, fans, and windows.
- Light the wick and immediately start timing your burn session, committing to the full duration required for complete melt pool formation.
- Monitor the melt pool’s progress, ensuring wax liquefies evenly across the entire surface to the container’s edge before extinguishing.
- Allow the candle to burn until the melted wax reaches within 3mm of the container edge on all sides, typically requiring one hour per 2.5cm of diameter.
- Extinguish the flame using a wick snuffer or by gently dipping the wick into melted wax with a metal tool, then repositioning it upright.
- Let the candle cool completely for at least two hours before moving, covering, or relighting to allow wax to solidify with proper memory.
Short burns between 10 and 30 minutes frequently cause tunneling by creating memory rings that trap edge wax permanently. Each abbreviated session reinforces this pattern, making correction exponentially harder. If you can’t commit to the minimum burn time, don’t light the candle.
Pro Tip: Schedule candle burning during activities that naturally last several hours, like reading, working from home, or evening relaxation routines. This ensures you won’t need to extinguish prematurely because you’re leaving the room.
Common mistakes to avoid:
- Blowing out candles instead of using a snuffer, which creates smoke and disturbs the wax pool
- Moving candles whilst wax remains liquid, causing uneven cooling and surface imperfections
- Lighting candles in high-traffic areas where people walking past create drafts
- Burning multiple candles too close together, causing heat interference between flames
- Neglecting wick trimming because the candle “seems fine,” allowing carbon buildup that affects burn quality
Consistency matters more than perfection. Following proper wick maintenance and burn duration guidelines for every session prevents tunneling far more effectively than attempting corrections after problems develop. Think of candle care as a ritual rather than a chore, integrating these practices into your mindfulness routine.
Between burns, store candles with lids or covers to prevent dust accumulation on the wax surface. Dust particles act as insulation, creating cool spots that disrupt even melting. Keep candles away from direct sunlight, which can fade colours and alter fragrance oils. Room temperature storage between 15°C and 25°C maintains wax integrity and optimal burning characteristics.
Verification and troubleshooting common tunneling issues
Spotting early tunneling signs allows intervention before the problem becomes irreversible. After your second or third burn, examine the wax surface once it’s completely cooled. A properly burned candle shows minimal height difference between centre and edges, typically less than 5mm. If you notice a pronounced depression in the middle with raised edges, tunneling has begun.
Measure the depth difference between the lowest point near the wick and the highest point at the container edge. Anything exceeding 1cm indicates established tunneling requiring corrective action. The earlier you catch this pattern, the easier correction becomes. Memory rings formed by early short burns cause persistent tunneling, but proper corrective burning can restore even melting.
| Corrective action | Expected outcome | Time required |
|---|---|---|
| Extended burn (2x normal duration) | Melts edge wax, resets memory | 4-6 hours |
| Aluminium foil tent method | Reflects heat to edges, accelerates melting | 2-3 hours |
| Hair dryer warming | Softens edge wax for manual levelling | 15-20 minutes |
| Oven warming at 80°C | Melts entire surface for complete reset | 10-15 minutes |
The aluminium foil method works remarkably well for moderate tunneling. Create a tent from heavy-duty foil with a hole in the centre slightly larger than your wick. Place this over the burning candle, allowing the wick to protrude through the opening. The foil reflects heat downward and outward, concentrating warmth on stubborn edge wax. Monitor closely, removing the foil once wax melts to the container’s edge.
Pro Tip: For severely tunneled candles, combine methods strategically. Start with oven warming to create a level surface, then use the foil tent during your next burn to establish proper wax memory moving forward.
Do’s and don’ts for fixing tunneling:
- Do commit to longer burn sessions immediately upon noticing early tunneling signs
- Do use the foil tent method for candles with 1-2cm depth differences
- Do trim wicks to 5mm before corrective burns to prevent excessive soot
- Don’t attempt to scrape or carve away edge wax, which creates uneven surfaces
- Don’t use open flames like lighters to melt edge wax, risking container damage
- Don’t give up on tunneled candles; most respond well to patient correction
Some candles resist correction despite your best efforts. This typically indicates fundamental issues with wick sizing or wax formulation rather than burning technique failures. Undersized wicks physically cannot generate sufficient heat to melt wax across larger diameters, regardless of burn duration. In these cases, the manufacturer’s quality control failed, not your candle care practices.
Prevent future tunneling by choosing quality candles from makers who properly test wick and wax combinations. Premium candles using natural waxes and appropriately sized wicks burn predictably when you follow basic care guidelines. Investing in quality prevents the frustration of fighting tunneling throughout a candle’s life.
Document your burning routine for expensive or special candles. Note burn duration, melt pool development, and any irregularities. This record helps identify patterns and refine your approach for specific candle types. You’ll discover that certain wax blends or container shapes require adjusted timing, allowing you to optimise performance based on experience rather than guesswork.
Discover mi KALMA’s handcrafted natural wax candles
Now that you understand how to prevent tunneling and maximise candle performance, you’re ready to experience candles crafted specifically to burn beautifully. mi KALMA creates luxury candles in small batches in Amsterdam using 100% natural European rapeseed wax, a renewable crop with exceptional burning characteristics and a lower transport footprint than imported alternatives. After extensive testing of natural waxes, we selected rapeseed for its clean, stable burn and superior scent performance.

Our Sanctuary scented candle features carefully balanced wick sizing that creates full melt pools reliably when you follow proper burning practices. We use vegan, phthalate-free, paraben-free fragrance oils at 10% concentration, designed and produced in France for exceptional room-filling performance. This contrasts sharply with mass-produced paraffin candles using just 2-3% fragrance.
Explore our candle accessories collection, including professional-grade wick trimmers that make maintenance effortless. Every mi KALMA candle arrives in a timeless black glass jar with recyclable packaging, reflecting our commitment to sustainability and refined aesthetics. As a queer-owned small business, we pour our values into every candle, creating products that support your daily rituals of calm and relaxation.
FAQ
What is candle tunneling and why does it happen?
Candle tunneling occurs when wax melts only in the centre around the wick, leaving solid edges unmelted and creating a vertical tunnel through the candle. It happens because candles develop wax memory during the first burn; if you extinguish before wax melts to the edges, the candle remembers that diameter and repeats the pattern with every subsequent burn.
How long should the first candle burn be?
The first burn should last approximately one hour per inch (2.5cm) of candle diameter to create a complete melt pool reaching the container edges. A 7.5cm diameter candle requires roughly three hours for proper wax memory formation. Never interrupt this critical first burn, as doing so virtually guarantees tunneling throughout the candle’s life.
How often should I trim my candle wick?
Trim your wick to exactly 5mm before every single burn without exception. This maintains optimal flame height, prevents soot formation, and ensures even heat distribution across the wax surface. Use proper wick trimmers rather than scissors to achieve precise cuts and catch debris before it falls into melted wax.
Can I fix a candle that has already started tunneling?
Yes, most tunneled candles respond well to corrective burning techniques. Try extended burn sessions lasting twice the normal duration, or use the aluminium foil tent method to reflect heat toward edge wax. For severe tunneling, carefully warm the entire candle surface in an 80°C oven for 10-15 minutes to reset the wax memory completely.
What candle types prevent tunneling best?
Candles made with natural waxes like rapeseed, soy, or coconut wax paired with properly sized wicks prevent tunneling most effectively. Look for candles from makers who test wick and wax combinations thoroughly, typically indicated by premium pricing and artisanal production methods. Container shape also matters; wider, shallower vessels develop full melt pools more easily than narrow, deep containers.